Solder flux is a substance that helps clean and forms a strong bond between parts of the electronic or wires. It achieves this by removing impurities from the surface and preventing them from interfering with the bond between it and the solder. The flux can be in liquid, paste, or powder form, and you can apply it before and during the soldering process.
Also Read– The front garden mistakes experts say to avoid and what to do instead
Before we go through the steps for how to use solder flux, let’s take a look at the three types of flux you can use.
What Flux to Use
Various types of soldering flux are available, and the one you choose depends on the metal and the electronics you are working with. These are the three main flux types:
- Rosin flux: Made from pine resin and containing acids, additives, and solvents, rosin flux is available in both liquid and paste forms.
- Water-soluble flux: It is made from organic materials, and you can use it in areas where you don’t want to leave any residue on the soldered joint. It’s effective in preparing components for soldering.
- No-clean flux: This flux does not need cleaning after soldering and is helpful in soldering electrical circuits. The flux that remains on the surface after soldering is conductive.
What Does Solder Flux Do?
Do you need flux to solder? Not necessarily, but using solder flux offers several advantages, such as the following:
- To improve the bonding of the joints: It ensures that the two areas you are joining together bond firmly.
- To clean surfaces before soldering: This is especially important for areas that are difficult to clean, such as metals that are oxidized or contaminated with oils.
- To improve the wetting of solder: It ensures that the solder flows wholly and evenly around the joint, which is necessary for a strong and reliable electrical connection.
- To prevent oxidation: It prevents the formation of oxides which can weaken the connection between the surfaces.
Read More:-Botox For Your Baby Hair? Apparently, It’s a Thing
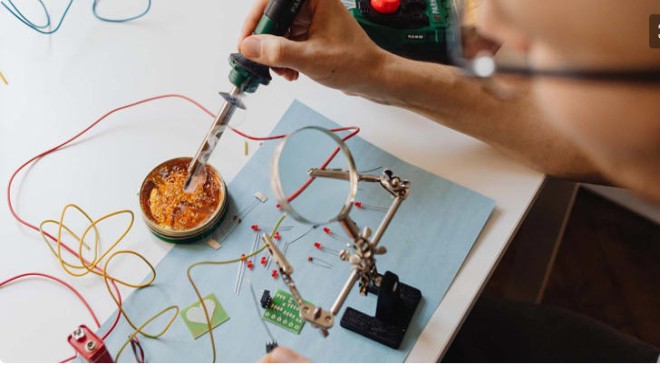
To learn how to solder with flux, you can follow the step-by-step process detailed below.
Step 1: Clean the Surface
Start by cleaning the surface that you are going to solder. The flux will help clean the surface, but you still need to clean it to ensure that the surface is free of dirt and debris. You can use a cloth, sandpaper, or a brush to clean. The important thing is that you do it, as the flux will not stick to dirty surfaces.
Step 2: Prepare Your Solder Flux
The preparation method will differ depending on the type of flux you have bought. For example, if you use powder flux, you can start by mixing it with a small amount of water to create a paste-like consistency. Not all solder fluxes need preparation. A soldering flux paste, for example, requires you to only open the lid of the tin and you are ready to start using it.
Step 3: Apply Solder Flux to Your Joint or Surface
Once you have prepared your flux (if it requires any preparation), it’s time to apply it to the surface you want to solder. You can apply it using a spatula, brush, cloth, or toothpick. As you apply the flux, remember to cover the entire surface you are soldering with it and ensure you use the correct amount. Applying too much flux can cause the joint to be weaker or more challenging to solder. Too little flux, conversely, can cause problems, such as insufficient protection against oxidation.
Read More:- HONOR Magic5 Lite Review: Fast, stylish and affordable
Step 4: Heat the Surface
Take the soldering iron and insert its plug into a power source to make it start heating up. Wait till it gets up to temperature.
Next, take the soldering wire and place it on the flux and start heating. The iron should be placed on the wire and moved around until the flux melts and the wire can flow into the joint. Just ensure that you clean your soldering iron before you start using it. Also, if it’s your first time soldering, you can check out the simple tips and projects for soldering to get a clue of how it’s done efficiently.
When you have finished creating the solder joint, remove the soldering iron from the joint and allow it to cool.
The joint will be stronger once it has cooled, as the flux will have time to work its way into the joint, and the solder wire will have time to harden.
How to Remove Soldering Flux
To remove soldering flux from a surface, you will need to use a flux remover. Depending on the one you’re using, you may need to dilute it with isopropyl alcohol or use it as it is. Just make sure that you follow the instructions on the packaging carefully.
Before using the flux remover, you will need to use the soldering iron to remove as much of the flux as possible. You can do this by placing the soldering iron tip on the section containing the solder flux and moving around it. You will be able to see the flux melting, and you can use a solder sucker to remove the melted flux or simply wipe the surface using a brush or cloth.
Once that is done, apply the flux remover, and wait for a few minutes before using the brush or sponge to scrub away any residue again. Finally, use a cloth or paper towel to remove any remaining flux.
Also Read-
Create Strong Bonds With Solder Flux
A solder flux ensures that you create strong bonds between your electronic components as it removes any oxide layers on the surfaces, which can prevent the solder from adhering correctly to the material. It also ensures that the solder flows well on the surface you are applying it to.
Also Read– Beware Of People Who Only Have One Photo On Their Dating Profile
When soldering, just remember to apply the flux directly to the soldered area; once it’s in place, you can then use the soldering iron to melt the solder onto the surface. Be cautious not to melt the solder too much, as you can damage your component. Removing excess solder can be achieved with a solder sucker or desoldering wick.